Print This Recipe


Print Friendly and PDF
​
Showing posts with label red velvet cake. Show all posts

Monday, February 13, 2023

Red Velvet Cake topped with No Bake Cheesecake

My hubby decided that the no bake cheesecake was perfect, but not sturdy enough for the Red Velvet Cheesecake. So, he decided that he wanted a sheet cake topped with the no bake cheesecake! It worked wonderfully! He has another new favorite to add to the list! 


Judy's Red Velvet Cake* 

1/2 cup shortening
1 1/2 cups sugar
2 eggs
2 teaspoons cocoa
3 tablespoons red food coloring
2 1/4 cups flour
1/2 teaspoon salt
1 cup buttermilk
1 teaspoon soda
1 tablespoon vinegar
1 teaspoon vanilla

Cream shortening and sugar. Add eggs. Mix well. Mix cocoa and food coloring in a cup. Add to eggs and sugar. Add vanilla. Sift flour and salt. Add, alternating with buttermilk. Add soda and vinegar. Let foam and FOLD into mixture. Bake at 350 for 30 minutes, or until a toothpick comes out clean. 

For a sheet cake... Grease and flour a 13x9 pan and add cake mixture. Bake for 25 minutes or until a toothpick comes out clean. Cool cake completely. 

*For a quick shortcut, you can use a cake mix. (It's just not as good!) 


No Bake Cheesecake 


8 ounces Cream Cheese (softened)
1/4 cup Sugar
Jell-O No Bake Classic Cheesecake Dessert Kit (filling packet only)


Place cream cheese in a large bowl and, using an electric mixer, beat until smooth and creamy. Add sugar and mix until combined and sugar is dissolved.

Set cream cheese mixture aside. In another bowl, mix the milk and no bake filling mix together following box directions. Add the cream cheese mixture and no bake mix together whisk or beat until thickened. Refrigerate 30 minutes to 1 hour if mixture is still thin.

Spread cheesecake mixture evenly over the cake layer and refrigerate until set. Cut and serve. Add red sprinkles if desired for a Valentine's Day treat! 


Saturday, December 10, 2022

Red Velvet Cheesecake


Red Velvet CheeseCake


Growing up, I always had Mama's Red Velvet Cake. She specialized in red velvet. I also loved cheesecake. I don't remember Mama ever making one, but we would order it for special occasions. The two desserts are my families favorite, so years ago, I decided to put the two together into one three-layered dessert! Just fyi, read the assemble directions at the bottom of the recipe to find my tips on time and ease of preparing the cake. 

Judy's Red Velvet Cake Layers


1/2 cup shortening
1 1/2 cups sugar
2 eggs
2 teaspoons cocoa
3 tablespoons red food coloring
2 1/4 cups flour
1/2 teaspoon salt
1 cup buttermilk
1 teaspoon soda
1 tablespoon vinegar
1 teaspoon vanilla

Cream shortening and sugar. Add eggs. Mix well. Mix cocoa and food coloring in a cup. Add to eggs and sugar. Add vanilla. Sift flour and salt. Add, alternating with buttermilk. Add soda and vinegar. Let foam and FOLD into mixture. Divide batter into two 8 inch greased and floured cake pans. Bake at 350 for 30 minutes, or until a toothpick comes out clean.

Icing
1/2 cup butter, room temp
8-ounces cream cheese, softened
1 box powdered sugar
1 teaspoon pure vanilla extract

Whip together until creamy. Spread on cake. * 


Rich and Creamy Cheesecake Layer


1 tablespoon unsalted butter, melted

3 tablespoons graham cracker crumbs

2 pounds cream cheese

1 1/4 cups sugar

4 large eggs

1 teaspoon minced lemon zest

2 teaspoons vanilla extract

1/4 cup heavy cream

1/4 cup sour cream


1. Adjust oven rack to middle position and heat oven to 500 degrees F.

Brush the bottom and sides of an 8-inch springform pan with butter. Sprinkle crumbs over bottom. Tilt pan in all directions to coat evenly with crumbs. Cover pan underneath and along sides with a sheet of heavy-duty foil and set on a cookie sheet.


2. Meanwhile, beat cream cheese in a bowl of electric mixer until smooth. Gradually add sugar and beat on medium speed until sugar dissolves,

about 3 minutes. Add eggs, one at a time, beating until just incorporated and scraping down after each addition. (If you don't scrape down the bowl after each egg, cream cheese that sticks to the bowl will ultimately show up as lumps in the batter). Add zest and vanilla and beat until just incorporated.  Remove bowl from mixer; stir in cream and sour cream.


3. Pour batter into the prepared pan. Bake cake at 500 degrees for 10 minutes. Reduce oven temperature to 200 degrees (prop oven door open with a wooden spoon until temperature reduces). Bake until the cheesecake perimeter is set but center jiggles like Jell-O when the pan is tapped, about 1 hour longer.

Remove the springform pan from the oven and set on a wire rack, cool to room temperature. Cover and refrigerate until chilled, at least 4 hours. (Can be refrigerated for up to 4 days). *

To Assemble Cake:


*I cook the cheesecake first. It takes longer to cook and longer to chill/freeze to handle. Once the cheesecake cools, wrap and put it in the freezer for at least an hour, then make the cake layers. Cool them on racks. I even put them in the freezer for a while to make sure they are cold when working with the icing.


Spread a tablespoon of icing on the bottom of the cake plate to hold the red velvet layer steady. Add a cake layer to the plate. Add a little icing to the top. You don't need much. The cheesecake is moist enough on its own. Place the cheesecake on top. Top with the other red velvet layer and finish icing the remained of the cake.


Wednesday, February 13, 2019

Red Velvet Truffles

They are simple and easy but will look like you spent all day to make them happy on your special day! 


Red Velvet Truffles! 

Cake*
1/2 cup shortening
1 1/2 cups sugar
2 eggs
2 teaspoons cocoa
3 tablespoons red food coloring
2 1/4 cups flour
1/2 teaspoon salt
1 cup buttermilk
1 teaspoon soda
1 tablespoon vinegar
1 teaspoon vanilla

Cream shortening and sugar. Add eggs. Mix well. Mix cocoa and food coloring in a cup. Add to eggs and sugar. Add vanilla. Sift flour and salt. Add, alternating with buttermilk. Add soda and vinegar. Let foam and FOLD into mixture. Bake at 350 for 30 minutes, or until a toothpick comes out clean.

Icing
2~ 8-ounce blocks of cream cheese, room temp
1 lb. box powdered sugar (10X)
1 teaspoon pure vanilla extract

Blend cream cheese until smooth. Add sugar and vanilla. Blend well.

Truffles
Crumble cake in a large bowl and add icing, mixing until it is the consistency of fudge. Scoop with a 1-inch cookie scoop or by the teaspoon full. Roll into a ball if using the teaspoon. Place on a sheet of wax paper on a cookie sheet. Freeze for about an hour. Melt white chocolate in a medium bowl (by double boiler or microwave) and coat each red velvet round. Set on wax paper to set. Return to freezer for 5 minutes, if necessary. Yields about 45, 1-inch truffles.


* You can take a shortcut and use a red velvet cake mix. Just be sure to still do the soda and vinegar trick at the end of mixing. It makes the cake mix moist and light. 


Wednesday, February 7, 2018

Valentine's Day Sale

Valentine's Day Goodies for sale! I think there's a theme here. LOL

Red Velvet Cake
Red Velvet Cheesecake
Red Velvet Truffles
Cherry Delight
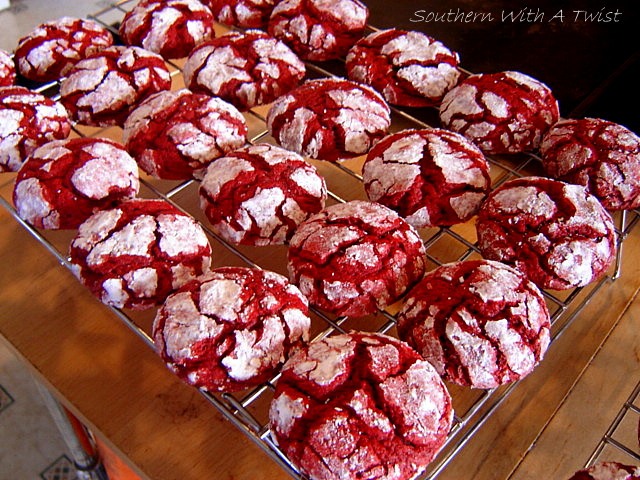
Red Velvet Crinkle Cookies
Chocolate Caramel Brownies
Macaroons with Chocolate Drizzle
Red Velvet Swirl Bites... and more.

Email me at southernwithatwist97@gmail.com if you are interested in purchasing any of these Valentine's Day goodies! They can be shipped anywhere in the United States for reasonable shipping costs.


Tuesday, October 4, 2016

Taylor's Red Velvet Crinkle Cookies

I was talking to one of my son's friends last night on Facebook. She asked me if I had tried crinkle cookies. I told her about mine, and she shared the way that she makes them. She mixes in whipped cream! She said it makes them extra light, fluffy and delicious! Wow! I've never seen someone use Cool Whip in cookie batter. I love it when a teenage can teach me a thing or two in the kitchen... ESPECIALLY when it involves BAKING! LOL You rock Taylor! 


1 box of cake mix 
8oz of cool whip (2 cups)
1 egg
Powdered sugar

Preheat oven to 350 degrees. Combine cake mix, egg and whipped cream. Form teaspoon size balls or scoop with a cookie scoop and roll in powdered sugar. Place on an ungreased (she lined it with parchment paper) cookie sheet or baking pan about 2 inches apart. 

Bake for 8-10 minutes.

Cool and plate.

Add a glass of milk and 
you have your late night snack!

Thanks for sharing with me last night Taylor!
You rock that oven girl!


Friday, February 13, 2015

Red Velvet Truffles


Cake
1/2 cup shortening
1 1/2 cups sugar
2 eggs
2 teaspoons cocoa
3 tablespoons red food coloring
2 1/4 cups flour
1/2 teaspoon salt
1 cup buttermilk
1 teaspoon soda
1 tablespoon vinegar
1 teaspoon vanilla

Cream shortening and sugar. Add eggs. Mix well. Mix cocoa and food coloring in a cup. Add to eggs and sugar. Add vanilla. Sift flour and salt. Add, alternating with buttermilk. Add soda and vinegar. Let foam and FOLD into mixture. Bake at 350 for 30 minutes, or until a toothpick comes out clean.

Icing
2~ 8 ounce blocks of cream cheese, room temp
1 lb box powdered sugar (10X)
1 teaspoon pure vanilla extract

Blend cream cheese until smooth. Add sugar and vanilla. Blend well.

Truffles
Crumble cake in a large bowl and add icing, mixing until it is the consistency of fudge. Scoop with a 1 inch cookie scoop or by the teaspoon full. Roll into a ball if using the teaspoon. Place on a sheet of wax paper on a cookie sheet. Freeze for about an hour. Melt white chocolate in a medium bowl (by double boiler or microwave) and coat each red velvet round. Set on wax paper to set. Return to freezer for 5 minutes,  if necessary. Yields about 45, 1 inch truffles.


Friday, December 7, 2012

A Christmas Family Story... and Judy's Red Velvet Cake!


A Christmas Tree in Every Room!


When I was growing up, each year we had at least two Bar-B-Ques, one at Thanksgiving and one at Christmas. The Bar-B-Que at Thanksgiving was on Saturday and was for all the employees and business associates of Mama and Daddy. The one at Christmas was on Christmas Eve and was for family and friends. We had about a hundred people at each. We would spend all week getting the house ready and two days getting all the food ready. Mama would take some of the guys from the shop (Central) and put them to work at the house. One year, Al Miller (a young black guy that worked at Central) told Mama, “ You've owned slaves before, Haven’t you?” It was always a busy and exciting time.


At one of the Christmas Bar-B-Ques, someone came out of the bathroom and I heard, “Oh my goodness, she even has a Christmas tree in the bathroom!” Mama had a Christmas tree in every room. The kitchen... living room... bathrooms... bedrooms... everywhere... We kids even had our own trees in our rooms. The trees ranged in size from 2 feet to 6 feet. Mama had a tree with seashell ornaments. One had dove ornaments. One had all homemade ornaments. One had all Victorian ornaments. One had all red and white ornaments. One had all Santa ornaments. She had a tree made of holly decorated with ornaments. She even decorated some of the houseplants!

Mama loved it. Holidays were another reason for parties, gifts and food with family and friends! Christmas was especially magical. Mama went all out. I remember one year Mama came home with Christmas sweatshirts. Mine read, ‘I Believe in Santa Claus.' Mama’s read, ‘I Want It All.' Charlie’s read, ‘Bah Humbug!’ Mama’s one requirement for Christmas morning presents was that you believe in Santa. Mama and I even had our picture taken with Santa.


One year when Charlie was about 6 years old, he came in and told Mama that there was no Santa Claus. She questioned him and then called everyone in the room. She said, “Listen up! Charlie has come in with the idea that there is no Santa Claus! That is not true! There is a Santa and anyone who does not believe in him...well, Santa won’t bring them presents. Is that clear? And I mean it! Clear?” Well, later Mama pulled us (except Charlie) aside and said that it didn't matter who Santa Claus was or where the presents came from. It was the love and giving of the Christ-mas season. But the presents did come and as long as we said we believed we’d get presents. It didn't matter if we were married or 50 years old, Santa would always come for us. What a concept! And she meant it. Jim and I got married (now my ex-husband) and she told him the same thing. That first Christmas, Santa brought Jim a recliner! The next year Jim told Mama at Christmas time, “I believe!”


Judy's Red Velvet Cake

There is no getting away from making this cake that Mama made famous in these parts. This is the most flavorful, moist and delicious cake I've ever made. I will say that to make this like Mama, you HAVE to follow the directions word for word... FOLD do not beat with a mixer at the end. It makes the cake dense and hard.


1/2 cup shortening
1 1/2 cups sugar
2 eggs
2 teaspoons cocoa
3 tablespoons red food coloring
2 1/4 cups flour
1/2 teaspoon salt
1 cup buttermilk
1 teaspoon soda
1 tablespoon vinegar
1 teaspoon vanilla

Cream shortening and sugar. Add eggs. Mix well. Mix cocoa and food coloring in a cup. Add to eggs and sugar. Add vanilla. Sift flour and salt. Add, alternating with buttermilk. Add soda and vinegar. Let foam and FOLD into mixture. Bake at 350 for 30 minutes, or until a toothpick comes out clean.

Icing:

1/2 cup butter, room temp
8-ounces cream cheese, softened
1 box powdered sugar
1 teaspoon pure vanilla extract

Whip together until creamy. Spread on cake. Garnish with chopped pecans if desired.

If you like Red Velvet, try this Red Velvet Cheesecake! Click on the hyperlink below this picture for the recipe. A perfect blend of two wonderful desserts!


Friday, February 10, 2012

Red Velvet Cheesecake

I had been fiddling around with this idea since I saw the Cheesecake Factory Red Velvet Cheesecake at Sam's Club the first of this month. I just could not see paying that much for something that I could make myself. Then I had to figure out exactly how I was going to make it!

Don't get me wrong. I have the best Red Velvet Cake recipe in the world (my Mama's :-)!
http://lynn-southernwithatwist.blogspot.com/2010/10/judys-red-velvet-cake.html

I'm not real strong on the cheesecake baking though. With that knowledge, I enlisted the help of Michele at La Belle Cuisine (labellecuisine.com).
http://www.labellecuisine.com/features/In%20Pursuit%20of%20the%20Perfect%20Cheesecake.htm

The marriage of these two recipes is a match made in heaven!

I'll state the obvious first... I went out and bought 3- 9inch aluminum cake pans (with straight sides) so I could get exactly the same size layers. My cake pans are all different (many with slightly angled sides), so this was a good thing! I baked the red velvet layers and started to work on the cheesecake. I have the cake down pat, but the cheesecake is where I need to concentrate! I used a half recipe (without the crust!) following the Dense and Firm Cheesecake instructions. After cooling, I put the cheesecake in the freezer. Freezing allows you to handle and transfer it to the cake.


I let the cake layers cool completely in the pans and wrapped them to assemble later. (I don't advise this, but I started on this to late at night to finish it!) Take the cheesecake out of the pan and place it on the bottom cake layer.


Top layer on now. Notice the handprint on the top of the cake... It is raining today, and the cake layers got rather sticky! LOL


The icing recipe is included with the red velvet cake recipe. The only change that I would make would be to add icing to the cheesecake layer.

All done...


And now it's time to have a piece!!! Yummmmmmm!!!
(Craig says that it's scrum-dilly-icious!) And all ready for Valentine's Day!

Saturday, January 21, 2012

Red Velvet Cheesecake

I had been fiddling around with this idea since I saw the Cheesecake Factory Red Velvet Cheesecake at Sam's Club the first of this month. I just could not see paying that much for something that I could make myself. Then I had to figure out exactly how I was going to make it!

Don't get me wrong. I have the best Red Velvet Cake recipe in the world (my Mama's :-)!
http://lynn-southernwithatwist.blogspot.com/2010/10/judys-red-velvet-cake.html

I'm not real strong on the cheesecake baking though. With that knowledge, I enlisted the help of Michele at La Belle Cuisine (labellecuisine.com).
http://www.labellecuisine.com/features/In%20Pursuit%20of%20the%20Perfect%20Cheesecake.htm

The marriage of these two recipes is a match made in heaven!

I'll state the obvious first... I went out and bought 3- 9inch aluminum cake pans (with straight sides) so I could get exactly the same size layers. My cake pans are all different (many with slightly angled sides), so this was a good thing! I baked the red velvet layers and started to work on the cheesecake. I have the cake down pat, but the cheesecake is where I need to concentrate! I used a half recipe (with-out the crust!) following the Dense and Firm Cheesecake instructions. After cooling, I put the cheesecake in the freezer. Freezing allows you to handle and transfer it to the cake.


I let the cake layers cool completely in the pans and wrapped them to assemble later. (I don't advise this, but I started on this to late at night to finish it!) Take the cheesecake out of the pan and place it on the bottom cake layer.


Top layer on now. Notice the handprint on the top of the cake... 
It is raining today, and the cake layers got rather sticky! LOL


The icing recipe is included with the red velvet cake recipe. 
The only change that I would make would be to add icing to the cheesecake layer.

All done...


And now it's time to have a piece!!! Yummmmmmm!!!
(Craig says that it's scrum-dilly-icious!)