Print This Recipe


Print Friendly and PDF
​
Showing posts with label jelly. Show all posts

Tuesday, August 1, 2017

Grape Jelly and Mosto Cotto Balsamic


The hubby planted a cutting from his Dad's grape vine several years back, and we are now finally getting enough to can! This vine is special to the Vining Family (no pun intended!) because it was brought to this country by his ancestors. He told me last night that it was his great, great, great, great Grandfather's cutting that started the vine on American soil! What a heritage to pass down!

I washed and sorted the grapes.

This is some of the heritage that I have from my 
Grandmama Bradham. Her chinois or stainless steel
cone with pestle. You can see it was well used! The pestle
is seasoned with many grapes and other fruits and vegetables!

I got 8 cups of juice from the grapes.

About the Mosto Cotto...
"Also called vino cotto, saba, and petimezi, mosto cotto means “cooked must.” The “must” is smashed grapes that in this case are cooked down into a delectable sweet sauce with the consistency of maple syrup. It is heavenly on fruit, cheese, or in salad dressings.

This is an ancient recipe found in countries all around the Mediterranean. It was originally used to create a sweetener in the era before sugar cane was introduced to that part of the world."

This is the mash or "must" (grape skins and seeds) that was left over.
I covered with water and simmered low and slow for 2 hours.
I added about 1/4 cup of red wine vinegar, and continued to
simmer until it was the consistency of a light syrup.

Grape Jelly

8 cups grape juice*
10 cups sugar
1 T lemon juice

Combine juices and sugar. Bring to a boil, and boil until the mixture reaches 220 degrees F. Process in jars of your choice in a water bath per canning instruction.

*When using the cone and pestle, this recipe doesn't need the added pectin. The lighter colored grapes (less ripe) contain a higher amount of their own pectin.

For the Mosto Cotto, follow these detailed instructions.
How to make Mosto Cotto (Vino Cotto) recipe


Tuesday, July 25, 2017

Cantaloupe Jam


Since the hubby planted a bigger garden this year, I have cantaloupe coming in faster than we can eat it. I started wondering if I could save it somehow. Freezing is, of course, not an option. Then I ran across an article online about melon jam, and thought, why not??? So, after a little research, I came up with this recipe for cantaloupe jam! I will admit that I did not completely wash the salt off of the cantaloupe. I did want a little salty-sweet flavor. I also admit that we sprinkle a little salt on our cantaloupe and watermelon. It seemed like the right thing to do, and it turned out delicious!  If you decide to do it this way, taste the cantaloupe before cooking it down to make sure it's not too salty. If it is, rinse it some more. With the next batch, I'm going to add peppercorns for another "twist." I already have 2 more large cantaloupes ripe and sitting in my kitchen!


14 cups cubed cantaloupe, about 2 large cantaloupe
1⁄4 cup kosher salt 
4 cups sugar
3⁄4 cup bottled lemon juice

Toss cantaloupe with salt in a large bowl. Cover and let stand 2 hours. Drain; rinse with cold water. Drain.

Stir together cantaloupe, sugar, and lemon juice in a large stainless steel pot. Bring to a boil. Reduce heat, and simmer uncovered about 20 minutes or until cantaloupe is soft. Mash cantaloupe pieces with a potato masher. (I used a handheld emulsion blender.) Simmer, uncovered, stirring often, about 1 hour until it reaches 220 degrees.*

Ladle hot jam into a hot jar, leaving 1⁄4-inch head space. Remove air bubbles. Wipe jar rim and apply the lid and band.

Place jars in water bath. Process jars 10 minutes. Remove jars and cool.


*Cooking time may vary due to ripeness and water content.


Tuesday, March 28, 2017

March Food In Jars Mastery Challenge ~ Jellies and Shrubs

A group of us are participating in the Food In Jars Mastery Challenge hosted by Marisa at Food in Jars. The March challenge was Jelly or Shrubs.

While just about everyone gets the concept of jams and jellies, Shrubs were a mystery to me even though I did bartend for a while. They were not popular back then, or the places I worked were not "upscale" enough to know about them. They are a very old concept from the days before refrigeration, but shrubs are making a comeback! 


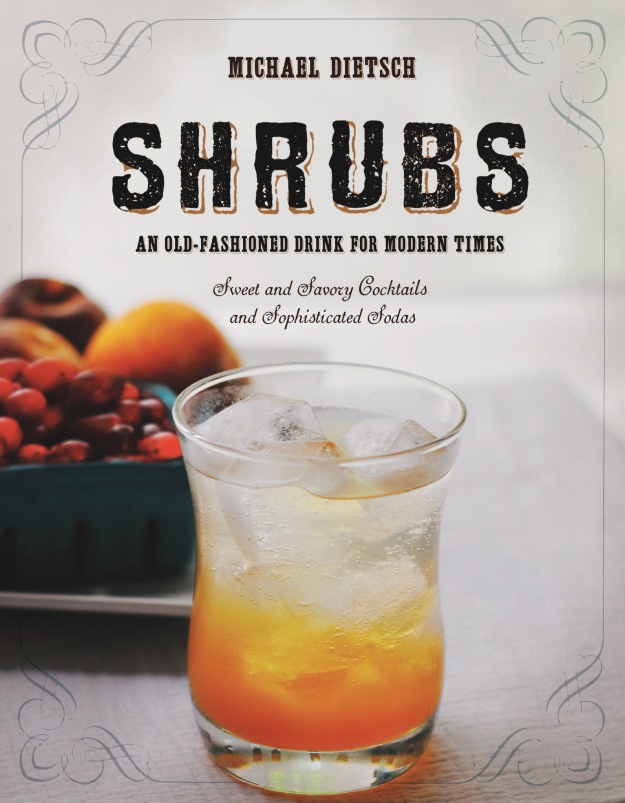
So, what does the word, shrub, mean, exactly? Michael Dietsch explains in rich detail the history of shrub-making, which dates way beyond Colonial times, in the pages of his recent book, Shrubs: An Old Fashioned Drink for Modern Times. A shrub is basically fruit, or even vegetables, combined with two other components: sugar and vinegar. After the correct ratio of those ingredients integrate over a little time, the result is a perfect balance of tartness, sugar, acidity, and texture. Shrubs are mouth-watering and concentrated, and they taste amazing when combined with soda, water or integrated into a cocktail.
how to make shrubs | holly & flora

I stuck with jelly since none of my gang would even begin to try the shrubs. It would be a waste and a shame to make a product to take a picture of and throw it away. I'll wait until our Adult Easter Egg Hunt ~ Spring Fling Party to make some Shrubs and get the big kids to try them! I'll keep you posted!

Check out our results!
Click the links below the pictures for the recipes:


Satsuma Mandarin Orange Pepper Jelly  - Mary Marshall -
Cooking with Mary and Friends
Recipe


Balsamic Vinegar Jelly with Onions Seeds - Sue Harris -
Jams 'n' Pans
Recipe


Cantaloupe, Orange and Coriander Shrub - Pamela Gram -
The Pitt Stop BBQ, LLC
Recipe


Pepper Jelly - Anne Marshall-Candeloro
Recipe


Pomegranate Molasses Shrub - Nikki Carriere
Recipe


Porter Beer Jelly - Sue Burns -
It's Ok to Eat the Cupcake
Recipe 
Mango, Szechuan Peppercorn, Kaffir Lime Leaf Shrub -
Tami Young -
Recipe


Cherry Jelly - Lynn Vining -
Southern with a Twist
Recipe


Monday, March 20, 2017

Cherry Jelly ~ March Food in Jars Mastery Challenge

I am participating in a year long Food In Jars Mastery Challenge hosted by Marisa from Food in Jars, and the March challenge was Jellies and Shrubs! Since my family and I really aren't into the Shrubs, vinegary concentrated drinks, I decided to stick with jelly, but I used my cherries from last years crop to make jelly. I've never made Cherry Jelly before. It is sweet, tart and delicious!


My cherries were frozen. I rinsed them off and set the colander on the base after they drained well. I let them thaw. I removed the pits over the colander, yielding about 4 - 4 1/2 cups of cherries. 


The base caught 3/4 cup of cherry juice! I cooked the cherries after adding Sure-Jell (I didn't need to add water since the base of my colander caught the juice. I boiled them and then added the sugar. I boiled them for a few minutes to yield the most juice. I used the colander and base again to separate the cherries from the jelly juice. I filled the jelly jars and processed them.


Jelly juice...
I skimmed off the foam.

Jelly done! Recipe below...
I reserved the cherries for chutney.


6 cups cherries, stemmed and pitted
  (Note that you are only using the juice for jelly which will yeild about 3 1/2 cups of juice)

1/2 cup water*
Sure-Jell
4 1/2 - 5 1/2 cups granulated sugar**

Stem and pit the cherries. Place cherries water and sure-jell into a large stock pot. Stir until the sure-jell is dissolved and cook over medium to medium high heat. Bring to a boil. Add all the sugar at once and return to a boil. I let mine cook down for about 10 minutes. Remove from heat and carefully strain the cherries and reserve them for some chutney or jam. Spoon the juice or pour into jars. I yielded 3 half pints and a 4 ounce jar from this batch. You can either process the jars of preserves in a water bath for 10 minutes, or store in the refrigerator. 
* I used frozen cherries from last year's batch, so I didn't need to add water. If you use fresh cherries, add a little water to dissolve the sure-jell and start the process of breaking down the cherries.

** 
Depending on how ripe the cherries are, you may use more or less sugar. These cherries are a little tart, so I used about 4 1/2 cups. Taste and adjust the sugar.


Monday, February 27, 2017

Cherry Jelly and Chutney using the Easy~Greasy System!

I received an email from Michelle at Easy~Greasy about her product. It is a colander with a base and lid. I was thrilled at her offer to send me one FREE to try out and review! Not only that, but she offered to give one to the lucky winner so I could do a giveaway! So, I set out to test her system and see if it would really be beneficial to me in the kitchen!


To start with, my cherries were left over from last year and were frozen. I rinsed them off and set the colander on the base after they drained well. I let them thaw. I then removed the pits over the colander. I usually do this in the sink with my regular metal colander.


I continued pitting cherries until I was done, leaving me about 4 - 4 1/2 cups of cherries. I was totally shocked when I picked up the colander and looked in the base!


The base caught 3/4 cup of cherry juice! That is the equivalent of an 8 ounce jar of jelly! I had no idea I was wasting that much juice! I cooked the cherries after adding sugar and Sure-Jell. I used the colander and base again to separate the cherries from the jelly juice. I filled the jelly jars and processed them.

Jelly juice...

Jelly done...

I used the cherries in a Chutney made of
cherries, granny smith apples and jalapenos. 

Well, I can tell you that the Easy~Greasy System made the entire process so much easier! Not only easier, but it added a jar to the yield from my jelly recipe! Thanks Michelle! Enter below for your chance to win an Easy~Greasy Strain and Save Kitchen Colander!

Cherry~Apple Jalapeno Chutney

1lb cherries, pitted, coarsely chopped
1 cup firmly packed light brown sugar
1 tart apple (such as Granny Smith), finely chopped
2 or 3 chopped jalapenos, or to taste
1/3 cup cider vinegar
3/4 teaspoon mustard seed
1/4 teaspoon allspice
1(4-inch) cinnamon stick


In 3-quart saucepan, combine all ingredients; stir to combine. Bring to a boil over high heat.

Reduce heat to medium-low; boil gently 50 to 60 minutes or until thickened, stirring occasionally. Remove and discard cinnamon stick. Cool at least 1 hour before serving. Store in refrigerator.


Saturday, January 21, 2017

Marmalades of the Food in Jars Mastery Challenge


A group of us are participating in the Food In Jars Mastery Challenge hosted by Marisa at Food in Jars and the first challenge was MARMALADE. It was so fun to participate and the results that the other participants came up with were awesome! Check out the recipes and pictures below!
If you would like to try your hand at making marmalade and not sure where to start, check out Marisa's great tips on Marmalade Troubleshooting! 

My friend Mary also joined in the fun. She is the Canning Queen around here! In her blog post Marmalade ~ January Challenge on Cooking with Mary and Friends, she stated:

"We all learned a few things from the others too, and everyone cheered on everyone else as their trials and tribulations were acknowledged. Everything from how adding liquor makes the marmalade take longer to jell and set up, to burning the pot ruining a batch happened, but no one got discouraged; they just tried again!"

YES! 
I was the one that burnt the batch and nearly ruined my pot! 

Check out the Pictures, 

and pick one to make yourself! 

A traditional Seville Orange Marmalade with a Twist
Sue Harris - Jams 'n Pans


Anne Marshall-Candeloro


Lynn Elliott Vining - Southern With a Twist


Veronica McLaughlin Gantley - My Catholic Kitchen


Nikki and Phil Carriere


Nikki and Chris Carriere


Julie Posigian


Thursday, July 30, 2015

Old Fashioned Fig Preserves


8 cups figs, stemmed
Sure-Jell
3/4 cup water
1/4 cup lemon juice
8-10 cups granulated sugar*

Stem the figs, letting some of the skin release also and discard. I don't completely skin mine, but tearing off a little helps when you mash them. Add all of the ingredients, except the sugar, into a large stock pot and cook over medium to medium high heat. Bring to a boil. Add all the sugar at once and return to a boil. I let mine cook for a few minutes. I also used a submersion blender to break up the figs. That step is totally optional. You can leave them whole or used a potato masher to mash them, if you like. Remove from heat and carefully spoon or pour into jars. I yielded 3 pints and 5 half pints from this batch. You can either process the jars of preserves in a water bath, or store in the refrigerator. 


One Pint is missing from the picture because
my DIL was here and took it home! LOL
Good stuff!

*Depending on how ripe the figs are, you may use more. My figs were the last of the harvest and were so ripe, most were dark brown, almost black. They were VERY sweet and required less sugar.